|
|
") Shop online: Shop online:
● not available
Shop in Warsaw (qty):
● not available
Shop in Chorzow (qty):
● not available
|
|
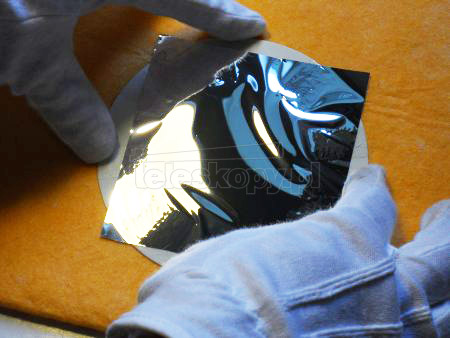
AstroSolar Safety Film OD 5.0 by Baader Planetarium - a high-class solar filter that allows you to safely observe the surface of the Sun, when properly attached to the telescope lens . This filter is in the form of a metallized foil that allows only a small fraction of the sun's rays to pass through. The solar foil meets the highest quality standards, transmitting one hundred thousandth of sunlight. Attached to the front of binoculars (both lenses are necessary), a spotting scope or a telescope, it allows you to get great images of the Sun when looking directly through the eyepiece. • dimensions: 10 x 10 cm (1 dm ^ 2)
• filtration level: 99.999%
• foil thickness: 0.012 mm
• designation / transmission class: ND5 / OD 5.0 ( foil intended for visual observation and simple photography)
• quality standard: CE
• cut the foil from a large sheet 50 x 100 cm to the size - you can order multiple (e.g. 4 dm2, 4 pieces) and specify the expected format or model of the telescope to which the filter will be used in the comment to the order (e.g. 20x20 cm, Dobson 8 etc.) Attention! We recall the formula for the area of a square: p = a * a = a ^ 2
It is also described below (table!), But to remind you: 20 * 20 cm = 400 cm ^ 2, i.e. 4 dm ^ 2, 30 * 30 cm = 900 cm ^ 2 etc.
If we need a square of 20 * 20 cm, then we order 4 pieces of 10 * 10 cm, not 2 pieces of 10 * 10 cm. If we need a 30 * 30 cm square, we order 9 pieces of 10 * 10 cm, not 3 (three) pieces. A square of 40 * 40 cm (ie with a side of 40 cm) has an area of 1600 cm ^ 2 (16 dm ^ 2), so it requires 16 pieces of 10 * 10 cm, not four (4x 10 * 10 cm). The shape of the cut foil is a square or a rectangle (we do not cut the shape of a circle). 

(an example of the use of foil - a photo of the solar eclipse of March 20, 2015; a large sunspot is visible)

comparison of Baader Solar Foil ND5 and ND3.8 (not offered anymore); ND 3.8 foil transmits 16 more light than ND 5 foil and is therefore not suitable for visual observation
(measurements on the Varian Cary 100 spectrophotometer, July 2015)
There are many ready-made luminaires on the market, you can also use a telescope cover or other suitable ready-made element as a solar foil frame. You can also prepare a cardboard binding - below two instructions. Do the following for a foil binding:

or, if you like to do everything thoroughly, have a look below. >> PHOTO-GUIDE FOR FITTING THE FRAME <<
 Below: a photo-guide for making a solar filter holder made of cardboard - it is the cheapest and universal method, applicable to any telescope, as well as all spotting scopes, binoculars and monoculars.
Tools and elements necessary to make the housing

(tools: compass, pencil, ruler and cardboard about 1-2 mm thick)
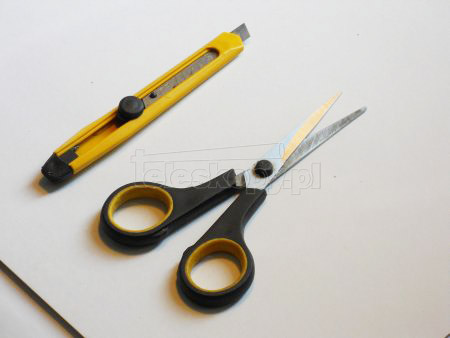
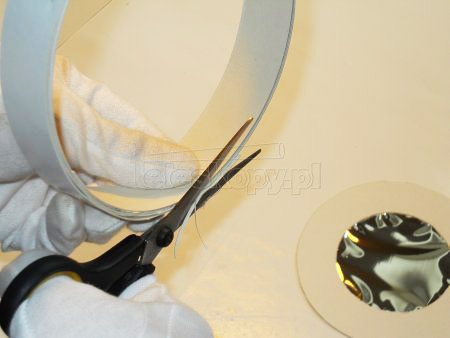
(paper cutter and scissors)

(double-sided adhesive tape, good thick glue for paper - we do not recommend an ordinary office one, clothes hooks, so-called crocodile clips)

(Baader Solar Foil)

(kerchief or even fabric)
Fabrication of the tube clamp
To make the clamps, you need rectangular cardboard strips with a width of approx. 2.5 cm - they can be narrower or wider, depending on the needs and the structure of the telescope's tube.

(on the edge of the box, measure the necessary width depending on the structure of the telescope's tube - optimally it is 2.5 cm)
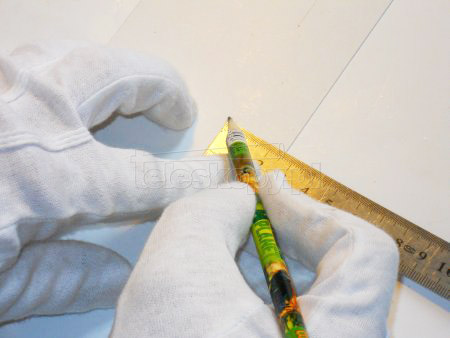
(on the opposite edge we mark the same dimension of the strip width)
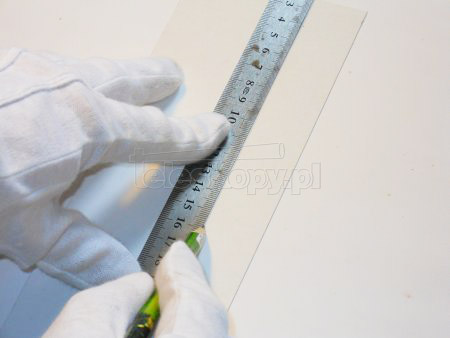
(we draw a line according to the measured width of the cardboard from edge to edge)
(cut a strip of cardboard along the line - this action can also be performed with scissors)

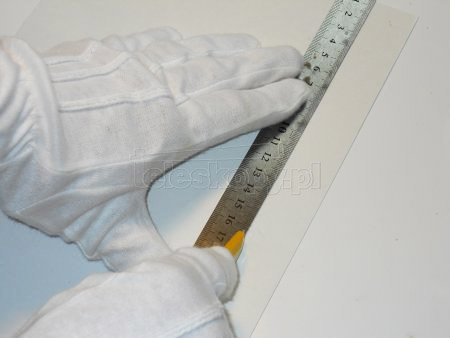
(we repeat the operation so as to get a few strips of cardboard - the required number of strips depends on the diameter of the telescope tube; for a tube with a diameter of approx. 13 cm and cardboard strips with a length of 43 cm, the optimal number is 4 stripes)
(try on a strip of cardboard to the telescope tube; if you do not have a sufficiently "long" cardboard box, several strips should be glued together)
(we lubricate one end of the strip with glue)
(we wrap the tube and glue the two ends together so that they overlap; press a buckle)
(we smear the surface of the second strip with glue)
(we wrap and stick)
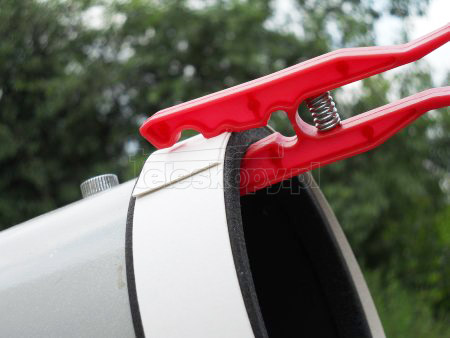
(you can use the help of a clip)

(repeat the activity by wrapping and sticking subsequent cardboard strips, holding them with clips; then wait for the glue to dry)
Fabrication of foil binding (filter mounting frame)
We begin binding the Baader foil into a cardboard box.

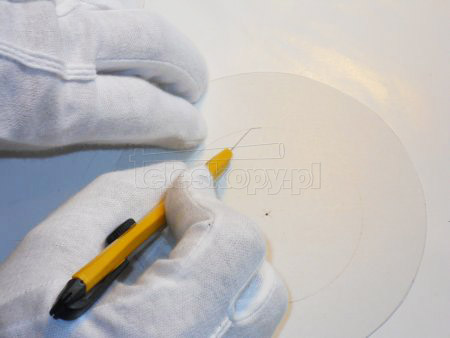
(the clamp taken off - measure its diameter; in our case it is about 13.5 cm - we take it with a margin of 14 cm)

(we set the radius of the clamp on the compass, i.e. half of the established diameter - 7 cm)
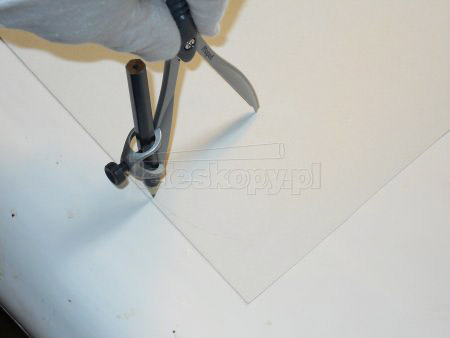
(we draw a circle on the cardboard, preferably as close to the edge of the cardboard as possible, so as to save the material)
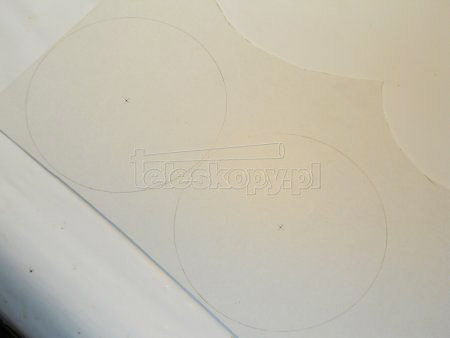
(two wheels will be needed)

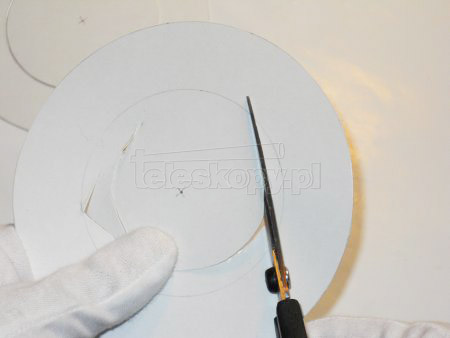
(we measure the diameter of the telescope's aperture on the compass - in this case the aperture is 76 mm, so the measured radius is approx. 38 mm, i.e. 3.8 cm; it is worth giving a slightly smaller radius - e.g. 3.5 cm - then at an additional theoretical cost minimal resolution decrease due to the reduced aperture, the image contrast will be improved, as we will significantly reduce reflexes, i.e. light reflection from the tube walls)

(we draw aperture circles, located centrally to the ones drawn previously)

(with the help of scissors cut out cardboard circles according to the outline)
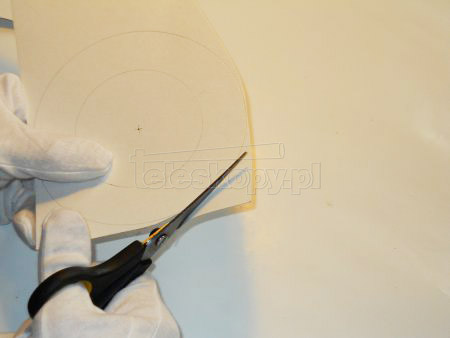
(cutting)

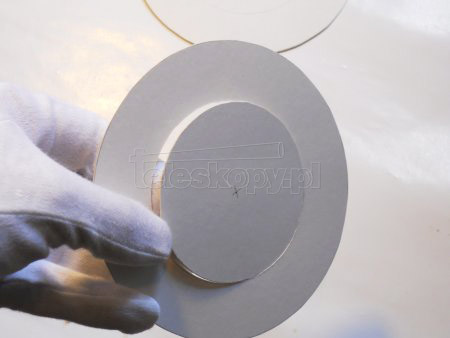
(two circles cut out, you can now start cutting out the centers)

(best to cut with a sharp paper cutter; if the cutter is not new, it is a good idea to break off the worn end of the cutter first)
(we separate the middle)
(alternatively, you can cut out the center with scissors, for this you need to cut the cardboard so that there is a place for inserting scissors)
(cutting with scissors should be done in a spiral, so that the cutting edge of the scissors gradually reaches the inner contour)
(two foil clamps cut out)

(we prepare pieces of double-sided adhesive tape. It is worth first cutting one of the ends of the tape evenly; alternatively, you can use glue instead of adhesive tape)

(instead of adhesive tape, you can also use glue, but the adhesive tape does its job much better)

(glue the next pieces of double-sided adhesive tape evenly to the clamp)
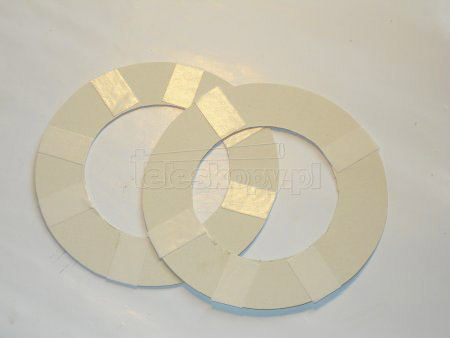
(consecutive stages of sticking, ultimately, for this diameter, the optimal number is 8 pieces on one side of the clamp; for larger diameters, more tape is used)
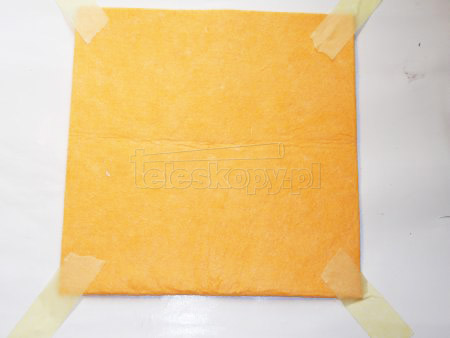
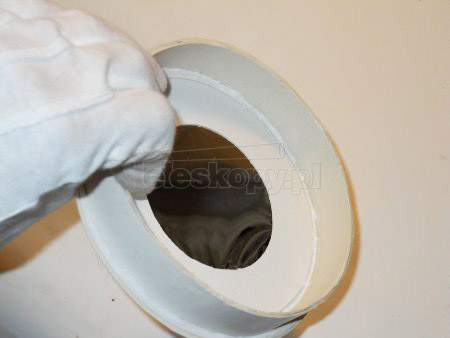
(stretch it evenly and tighten the handkerchief or fabric - thanks to it you can lay it flat and without stretching the Baader solar foil)
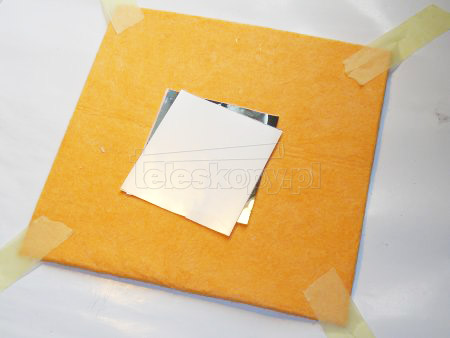
(put a piece of foil intended for the filter)

(we try on the foil clamp)

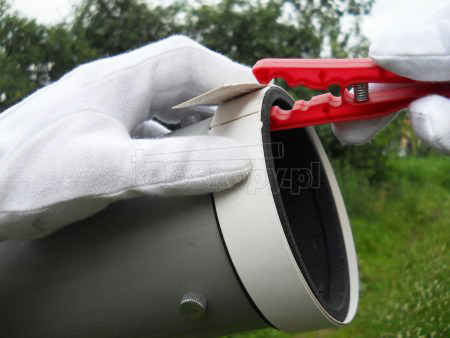
(we tear off the securing of the other side of the adhesive tape)


(gently stick to the foil - you should of course remember to remove the foil protection earlier)
(we turn the whole thing and possibly gently align the other side)

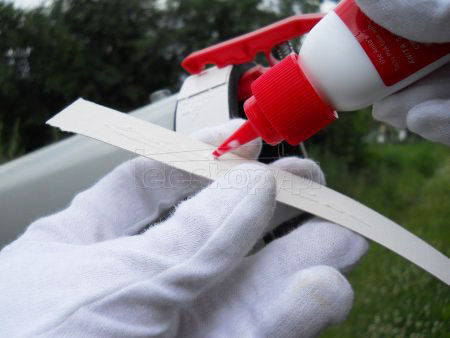
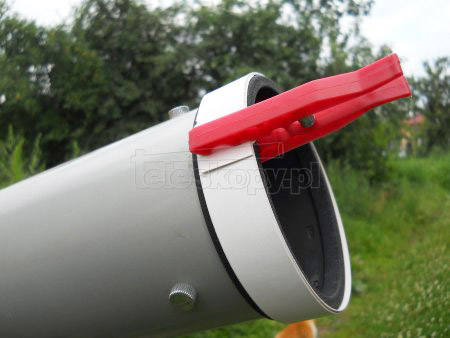
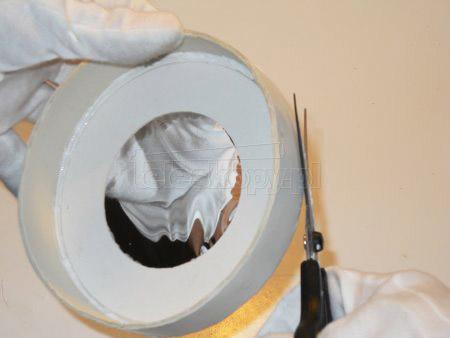
(evenly glue the second part of the foil clamp)

(cut off the excess foil with scissors)

(ready foil binding - it is worth trying to make it so that the foil surface is as even as possible, and at the same time not too tight; in our case it was only partially successful ;-D)
Gluing both elements together and finishing

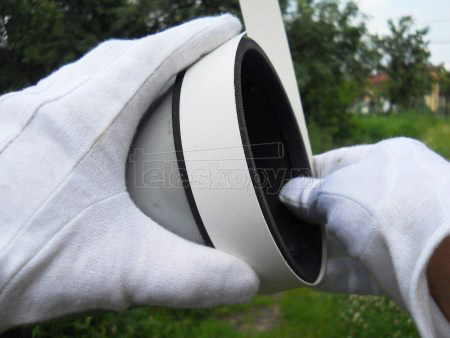
(ready-made luminaire elements: tube clamp and framed foil)
(if necessary, align the edges of the clamp)
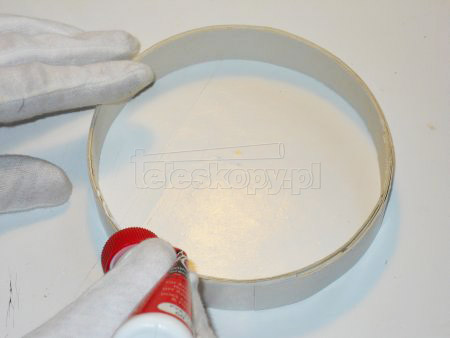
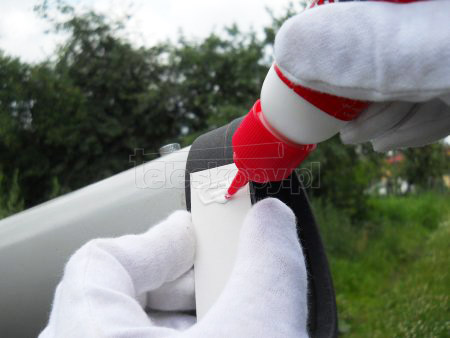
(coat the edge of the clamp with plenty of glue)

(a lot of glue will fill empty places not adhering to the carton and additionally strengthen the structure)
(we glue the tube clamp to the foil frames as centrally as possible)

(the place of gluing can be additionally filled with glue)
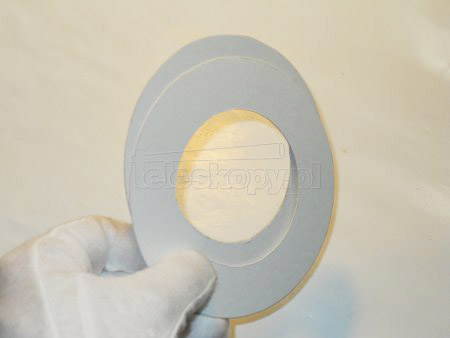
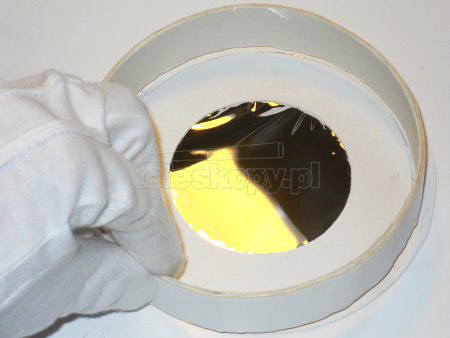
(ready-made, glued tube clamp to the foil frame - the fitting is practically ready)
(after the glue has dried, the protruding edge can be leveled with scissors)

(the sun filter for the telescope is now ready for use)
For safety reasons, it is worth to secure the filter against slipping during observation with adhesive tape, attaching the fitting to the tube with the tape, preferably in two places. It is also worth painting the inside of the frame filter with black ink.

(Sun and spots - click to enlarge)
|


")


")


")

")


 MAY 2017 No. 5/17 (59)")
 MAR 2013 No. 3/13 (9)")
 JUNE 2016 No. 6/16 (48)")
 JANUARY 2016 No. 1/16 (43)")
 MAY 2013 No. 5/13 (11)")
 JULY 2016 No. 7/16 (49)")
 OCTOBER 2013 No. 10/13 (16)")
 MARCH 2016 No. 3/16 (45)")
 JULY 2013 No. 7/13 (13)")
")
")


")


")
 APRIL 2014 No. 4/14 (22)")
")


